Article

Getting Started with Crypto Wallets

Welcome to Bankless. Time for your first crypto wallet!
Bankless Bankless Dec 18, 20235 min read
2
1
Getting Started with Crypto Wallets


Welcome to our second Bankless Journey.

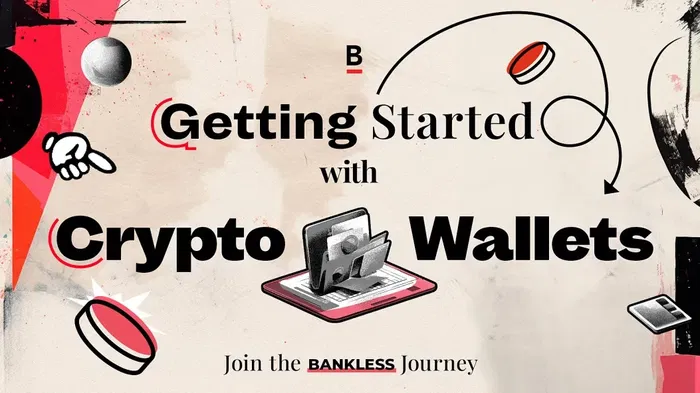
Now that you know why we’re here in crypto, the next part of our ongoing Bankless Journeys series is going to demystify one of the most crucial components of the entire cryptocurrency ecosystem—the wallet.

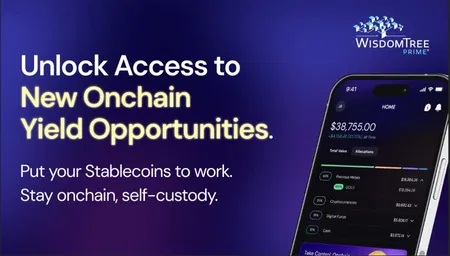
A wallet is a way to store and transact with crypto, but it's also like a gateway to your identity and digital assets. It can act as your onchain resume, showcasing your interactions within the crypto space and qualifying you for new experiences like airdrops and NFT mints. You can also use your wallet to sign in to crypto apps so you can bring your data with you and own it wherever you go. 

In this Journey, we’ll highlight some of the top wallets available to you today and then touch on some additional possibilities, from registering an ENS name for your addresses to securing your wallet stack from crypto hacks. Let’s begin!

⚫️ Picking your first wallet

Software wallets, whether browser-based extensions or mobile apps, are the easiest and most practical avenue to interact with crypto and NFTs. In this category of products, the big giants in the Ethereum ecosystem today are MetaMask, Coinbase Wallet, and Rainbow

All three of these wallets are suitable for both newcomers and crypto experts alike, yet all of them also boast unique offerings to consider. For example, MetaMask supports community-built plugins through MetaMask Snaps, Coinbase Wallet provides in-app messaging via XMTP, and Rainbow offers extensive keyboard shortcuts

To help you navigate the ins and outs of these major providers, we’ve prepared three respective guides here to help you get started with diving in. 

👉 Coinbase Wallet 101

👉 MetaMask 101

👉 Rainbow 101

⚫️ Level up with hardware

Once you’ve gotten started with a software wallet, consider stepping up your security by complementing it with a hardware wallet. A hardware wallet is a physical device that securely stores your private keys offline, with these keys being what you use to authorize crypto transactions. This offline approach, combined with physically verifying and signing transactions with a device, makes hardware wallets among the safest ways to store crypto. 

The most popular hardware wallet manufacturer today is Ledger, and its devices are compatible with all the aforementioned software wallets. Another popular device is the Lattice1 by GridPlus. Here are our primers on how to get started with a Ledger or Lattice1, including how to back up and safely store your device. 

👉 Setting up a Ledger

👉 Setting up a Lattice1

⚫️ Creating a digital vault with a multi-sig

Arguably the safest way to store your crypto and NFTs for the long term is through what’s called a “multi-signature” wallet, or multi-sig. As its name suggests, this type of wallet requires multiple wallets to approve a transaction before it can be executed. 

So for example, if you created a “2-of-3 multisig,” that means you’d have a wallet that can only be used if at least 2 of the 3 addresses you’ve approved sign off on a transaction. This layered approach allows your assets to remain safe even if one of your addresses gets compromised by a hacker. 

In the cryptoeconomy today the most popular multisig solution is Safe, though there are rising alternatives like Avocado that are also worth considering. Whichever route you go, after you create a multi-sig test it out some to get comfortable with it before you send your holdings in.

👉 Making a Safe multi-sig

👉 Making an Avocado multi-sig

⚫️ Defending your stack

A hardware wallet can help you safely store your crypto, but what if a bad actor tricks you into signing a malicious transaction that you didn’t understand? Or what if a project you’ve interacted with in the past gets hacked?

The good news is you’ve got a range of options to defend your wallet, like transaction preview tools and routinely revoking your wallet approvals. In this must-read security primer, we walk you through all the basics of locking down your stack for good!

⚫️ Registering an ENS name

The Ethereum Name Service (ENS) lets you register a human-readable name, like “yourname.eth,” to represent your Ethereum wallet’s long, alphanumeric address. You can then use this domain to send and receive crypto and as a marker for your onchain reputation, making transactions simpler and more personal. In this starter guide, we get you up to speed on how to use the new ENS Manager App to register and oversee your .eth names!

⚫️ Getting the most out of your address

Through the course of your journey in crypto, you’ll interact with various people and projects. Over time these interactions may qualify you for rewards, like airdrops or NFT mints. 

At a certain point, it can become overwhelming trying to keep track of all these potential opportunities, but it doesn’t have to be hard. One of the first in-house tools we’ve developed at Bankless is our Claimables resource, which tracks your eligibility for crypto rewards from one convenient dashboard. Check it out periodically to keep on top of all the things you can claim with your wallet!

🏆 Now you're up to speed on wallets! Congratulations on completing your second crypto journey!

As you continue on your path, you'll find that your wallet is more than just a tool for transactions—it's your passport to the ever-evolving world of digital assets and decentralized apps. Now that you’re ready with the basics of wallet maintenance, our next releases will focus on what you can do in crypto like DeFi, NFTs, and beyond. Stay tuned to keep mastering the basics!

2
1
Bankless

Written by Bankless

198 Articles View all      

1 Response